In terms of realizing a healthy, dense lawn, nothing compares to sod installation for instant gratification. Sod provides an almost-instant green cover that transforms your lackluster landscape, delivering immediate beauty and functionality. Unlike seeding, which can take weeks to germinate and establish, sod gives you a lush lawn from day one.
Whether you're starting a new lawn or repairing an existing one, installing BIMINI® Bermudagrass can seem intimidating. It's a significant investment, and the sod is a living product that requires immediate and careful handling. However, by following proper steps when laying sod, you can ensure it successfully establishes and thrives to its full potential. Read on for tips to help you with the process.
How to Install BIMINI® Bermuda Sod
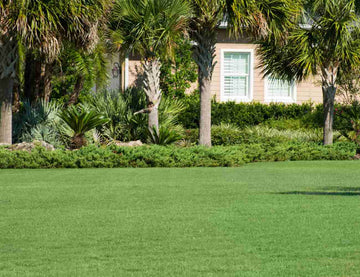
Installing BIMINI® Bermuda sod improves your property's curb appeal, boosting the aesthetic value of your home. Beyond its visual appeal, this instant green cover provides practical benefits such as suppressing weed growth, controlling erosion, and enhancing soil quality.
Step 1: Research
Find a Local Supplier: Sod installation begins with thorough research, starting with finding reputable sod suppliers of BIMINI® Bermuda. It's essential to choose a local sod farm because sod is a living product, and delivery time is a significant factor in its success. Additionally, local suppliers are more knowledgeable about your area's conditions and can offer valuable advice on how to install and maintain your sod properly. You can find a full list of BIMINI® growers on our website to locate a trusted supplier in your area.
Budget: Budget is also a key consideration in a sod installation project, which should include the cost of the sod and any additional expenses for soil preparation, tools, and labor if you plan to hire professionals. While it's possible to install sod yourself, hiring someone expert for the job can save you from potentially costly mistakes and ensure a successful outcome. Assess your budget carefully to ensure that you can complete the project within your financial constraints while still achieving the desired results.
Step 2: Soil Preparation
Test Your Soil: While optional, testing your soil can provide valuable insights to help you create a conducive environment for growth and provide a healthy foundation for your new BIMINI® sod. The analysis can help you balance the soil pH, fertilize according to specific needs, and apply soil amendments to improve soil structure. Read here for a brief guide to soil testing.
Prepare Your Soil: Clear your lawn of existing grass, weeds, rocks, and debris. If using herbicides, apply them at least two weeks before sod installation to allow the chemicals to dissipate and avoid damaging your new grass. Always follow the label instructions and safety precautions when using chemical treatments. Use a sod cutter to remove the layer of dead grass and debris, ensuring a clean surface for your new sod to thrive.
Aerate and Level: Aerating your lawn relieves soil compaction, which restricts root growth and prevents water, air, and nutrients from penetrating the soil. Additionally, leveling the soil is crucial to improve sod-to-soil contact, which helps facilitate faster establishment of your new sod.
Measure the Area: After clearing your lawn, measure the area accurately to determine the amount of BIMINI® sod you'll need. BIMINI® sod is usually sold in pallets, so knowing your lawn size will help you calculate the quantity of pallets required. We recommend purchasing slightly more than needed to account for errors or irregularities. Make sure there are no gaps between the pallets where weeds may grow.

Step 3: Installation
Because BIMINI® sod is a living product, all preparation work should be completed on the day of installation. Sod farms deliver fresh sod that should be installed promptly on the same day to prevent it from drying out. This ensures that the sod has the best chance of establishing and thriving in its new environment.
Lay the sod in a brick pattern and then use a sod roller to firmly press it into the soil. This step is crucial for establishing good contact between the sod and the soil, which helps remove air pockets and smooth out any uneven areas.
Water your lawn thoroughly immediately after installation, soaking the soil to a depth of 3-4 inches. This step helps prevent the grass from drying out and ensures that the sod roots make good contact with the soil for successful establishment.
Step 4: Post-Installation Care
Post-installation care is just as important as preparing your lawn for sod installation, as it will ensure the sod establishes well in the soil and grows into a dense and healthy lawn. Water regularly to keep the soil consistently moist during the establishment stage and fertilize it as the soil test results recommend.
Watering: Water thoroughly early in the morning and again in the late afternoon to keep the soil consistently moist during the first 10-14 days. Make sure you're watering enough to reach the roots and soil, paying particular attention to exposed or loosely placed edges where the individual sod pallets can dry out.
Adjust your watering schedule based on rainfall to avoid waterlogging. During this initial period, you should start to see fresh white roots as the sod establishes. Gradually taper the watering frequency as the grass takes root, eventually settling into a once-a-week watering schedule.
Fertilizing: It's generally recommended to wait at least 4-6 weeks after installing new sod before fertilizing. This period allows the sod to develop its root system and adapt to its new environment. When you do fertilizer, use a balanced fertilizer specifically labeled for new sod, as it is formulated to contribute to healthy root growth and overall establishment of the new lawn.
Mowing: Wait until the sod has firmly rooted into the soil, usually 2-3 weeks after installation, before using a lawn mower. Set your mower to the highest possible setting to trim only the tops of the grass blades. If pieces of the new lawn come up while mowing, it's a sign that the mower is set too low or that the BIMINI® sod has not yet developed sufficient roots. Stop immediately and wait a few more days before attempting to mow again.

Is BIMINI® Bermuda Sod For You?
In addition to proper installation practices, the success of establishing a new lawn from sod also hinges on using the right grass type for your specific weather and soil conditions. Bermuda grass, for example, is well-suited to the warm and humid climate of Florida.
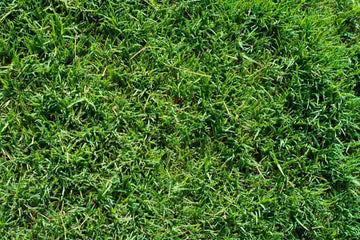
BIMINI® is a fine-textured Bermuda grass variety known for its dark green color and excellent heat and drought tolerance. While it thrives in full sun, it can adapt to various conditions, including shade and cold. In a trial with Oklahoma State University, BIMINI® ranked number one in traffic tolerance and durability. It is the last to go dormant, retaining its color in temperatures where other varieties would turn brown, and is also the first to green up in spring.
These characteristics make BIMINI® adaptable to many uses, explaining its widespread use in golf courses and athletic fields. It continues to prove itself as an exceptional option for residential applications and high-traffic areas like sports fields, providing a durable and resilient lawn with excellent winter color and the ability to recover quickly from wear and tear.
Did you find this article helpful? Share your thoughts by leaving a comment.